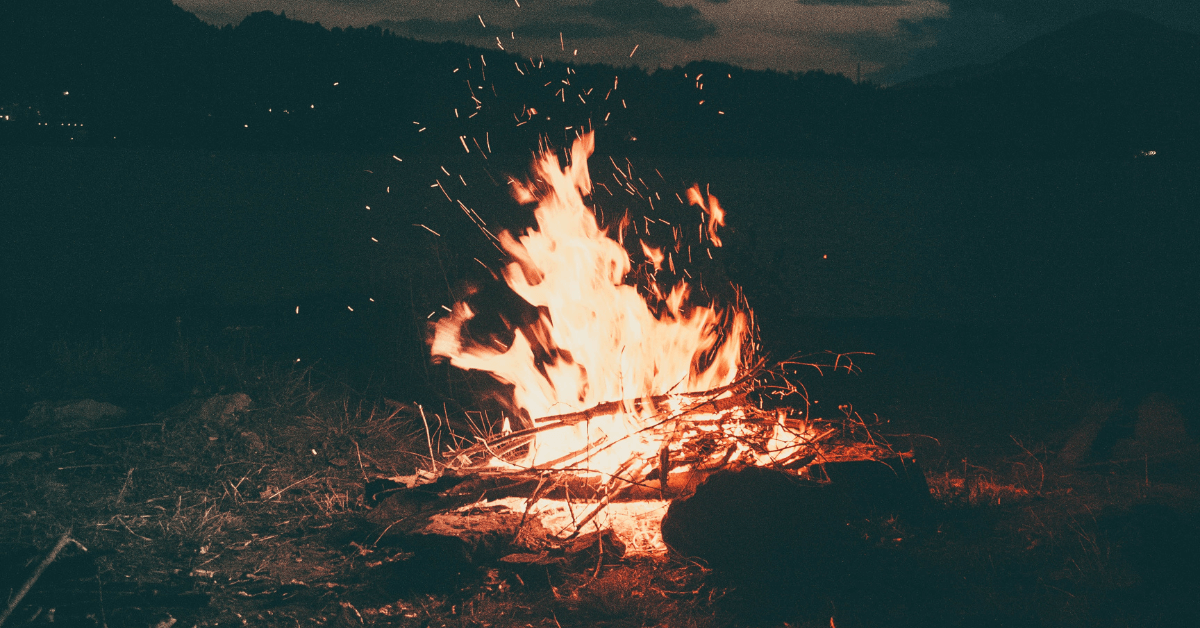
Making a fire is one of the most essential skills any outdoor enthusiast should possess. Whether you are camping, hiking, or just exploring the great outdoors, knowing how to make a fire can mean the difference between life and death. However, what do you do if you find yourself in a situation where you have nothing to start a fire with?
Knowing how to make a fire with nothing is a crucial survival skill that could save your life in an emergency situation. With that in mind, today, we’ll take you through the steps to make a fire in the wild with nothing but natural materials.
We’ll also cover the importance of knowing how to make a fire in the wild, the materials you need to gather, and the step-by-step process to build a fire that will keep you warm, cook your food, and even signal for help. So, let’s get started and learn how to make a fire in the wild with nothing!
Step 1: Finding the right location
Before you start making a fire, it’s important to find the right location to prevent any unwanted consequences. Choosing the right location for a fire will ensure that it is safe, contained, and won’t spread to other areas. Here are some tips on finding the right location:
1. Look for a clear spot with no dry brush or leaves nearby
Look for a spot that is clear of any flammable materials, such as dry leaves, grass, or twigs. Clear the area of any debris that could catch fire easily. Also, avoid areas with loose soil or sand, as they can easily spread the fire.
2. Avoid setting fires near trees or other flammable objects
Setting a fire near trees or other flammable objects could result in a fire that quickly gets out of control. It’s important to keep a safe distance between the fire and any trees, bushes, or other flammable objects.
3. Consider the wind direction and make sure your fire won’t spread
The wind is one of the biggest factors that can cause a fire to spread quickly. Before starting a fire, check the direction of the wind and choose a location where the wind won’t blow the flames toward other areas. Avoid starting a fire on a slope, as the wind can easily carry the flames uphill.
4. Check the fire regulations in the area
Before starting a fire, make sure you’re allowed to do so in the area you’re in. Some areas may have specific regulations or restrictions on fires, so it’s important to check before starting a fire.
Step 2: Gathering materials
Once you’ve found a safe location for your fire, it’s time to gather the materials you need to start it. The key to starting a fire in the wild with nothing is to gather natural materials that will easily catch fire and burn long enough to ignite larger materials.
Here are the materials you’ll need to gather:
- Tinder
Tinder is the material that will catch fire easily and quickly. Look for dry materials such as grass, leaves, or bark. You can also use fine twigs or pine needles as tinder. It’s important to gather a sufficient amount of tinder, as it will be the foundation of your fire.
- Kindling
Kindling is the next material you’ll need to gather. It’s slightly larger than tinder and will burn longer, helping to ignite larger materials. Look for dry twigs or small branches that are about the size of a pencil. Gather a handful of kindling, making sure it’s dry and easily breakable.
- Fuel
Fuel is the larger material that will keep your fire burning for a longer period of time. Look for logs or branches that are thicker than your wrist. It’s important to make sure your fuel is dry, as wet wood won’t burn well. Gather enough fuel to keep your fire burning for as long as you need it.
- Other materials
You can also gather other materials to help start your fire, such as pinecones or dry moss. Pinecones are great because they’re filled with resin, which is highly flammable. Dry moss is also great because it’s very flammable and burns slowly.
Related: A Guide To Comfortable Tent Camping For Seniors
Step 3: Building the fire
Now that you’ve gathered the materials you need, it’s time to build your fire. The key to building a successful fire in the wild is to arrange the materials in a way that allows air to flow freely, which will help the fire ignite and spread.
Here are the steps to building your fire:
1. Create a fire pit
Before you start building your fire, create a fire pit to contain the flames. Clear an area of any debris or flammable materials, and dig a shallow pit in the ground. Surround the pit with rocks or logs to help contain the flames.
2. Arrange the tinder
Take your dry tinder and form a loose nest in the center of the fire pit. Make sure the tinder is arranged in a way that allows air to flow freely through it. This will help the flames ignite quickly and easily.
3. Add the kindling
Once your tinder is arranged, add your dry kindling on top of the tinder in a criss-cross pattern. This will help create gaps between the kindling, allowing air to flow through and helping the flames spread.
4. Add the fuel
Finally, add your dry fuel on top of the kindling. Make sure the fuel is arranged in a way that allows air to flow freely through it, and make sure there’s enough fuel to keep the fire burning for as long as you need it.
5. Light the fire
Use a lighter or matches to light the tinder in several places. The flames should quickly spread to the kindling and fuel, creating a strong, steady fire.
Remember, building a fire in the wild requires patience and attention to detail. Make sure you’ve gathered enough materials, arranged them properly, and lit the fire safely. Once your fire is burning, you can enjoy the warmth and light it provides while taking in the beauty of the great outdoors.
Step 4: Maintaining the fire
Once you have built your fire, it’s important to maintain it properly to ensure it continues to burn safely and efficiently. Here are some tips for maintaining your fire:
1. Add fuel
As the fire burns, you’ll need to add more fuel to keep it going. Add small pieces of fuel gradually, making sure not to smother the fire. Avoid adding too much fuel at once, as this can cause the fire to flare up and become uncontrollable.
2. Keep the fire contained
Make sure the rocks or logs surrounding the fire pit are secure and won’t collapse, as this could cause the fire to spread outside of the pit. Don’t leave the fire unattended, and keep a bucket of water nearby in case you need to extinguish the flames quickly.
3. Keep the fire under control
If the fire gets too large or starts to spread, use a shovel or stick to move the fuel away from the flames. Don’t try to put the fire out with water, as this can cause steam to create embers that could potentially start new fires.
4. Monitor the wind
Keep an eye on the wind direction and speed, as this can affect the behavior of the fire. If the wind starts to pick up, you may need to add more fuel to keep the flames from dying out or spreading too quickly.
5. Extinguish the fire
When you’re ready to leave the fire, make sure to extinguish it completely. Use water to douse the flames, making sure all of the fuel has been fully extinguished. Stir the ashes and embers with a stick to make sure they’re cool to the touch.
Step 5: Putting out the fire
Putting out a fire in the wild is just as important as building one. Leaving a fire burning can lead to catastrophic consequences, such as wildfires that can quickly get out of control.
Here’s what you need to know to safely put out your fire:
1. Prepare your materials
Before putting out your fire, prepare a bucket of water or a shovel and dirt nearby. You’ll also need to stir the ashes to make sure they’re cool to the touch. Keep in mind that coals can stay hot for several hours after the flames have died down, so be patient and take the time to fully extinguish the fire.
2. Remove all fuel
Use a shovel or stick to move any remaining logs or branches away from the fire pit. Make sure to spread the fuel out so it can cool down more quickly. Never leave any fuel behind, as this can reignite and start a new fire.
3. Douse the flames
Pour water over the fire, making sure to cover all areas of the fire pit. Keep adding water until the hissing sound stops and the steam disappears. If you don’t have water available, use dirt or sand to smother the fire. Stir the ashes and embers with a stick to make sure they’re cool to the touch.
4. Check for hotspots
Use the back of your hand to feel for any remaining heat in the fire pit. If you feel any warmth, continue pouring water or dirt over the area until it cools down completely. Make sure to also check for any hotspots in the surrounding area, as these can also reignite and start a new fire.
5. Clean up the area
Once the fire is completely extinguished, make sure to clean up the area. Dispose of any ashes or debris properly, and make sure to leave no trace of your fire. This means packing out all your trash and leaving the area in the same condition as when you arrived.