As outdoor enthusiasts, we all know how much we love taking our RVs on road trips and camping adventures. However, with all the fun that comes with RVing, we also have to be mindful of the damage that water can cause to our vehicles. That’s why each RV owner must learn how to waterproof their RV to protect it from water damage.
In this article, we’ll provide a comprehensive guide on how to waterproof your RV. From locating leaks to sealing windows and doors, caulking the roof, and protecting the underbelly, we’ll cover all the necessary steps you need to take to keep your RV safe and dry.
So, whether you’re a full-time RVer or someone who enjoys weekend getaways, keep reading to learn how to waterproof your RV and ensure your next adventure is worry-free!
Here are the six best ways to waterproof your RV:
1. Locate the Leaks
The first step in waterproofing your RV is to locate any existing leaks. Before you can address the problem, you need to know where it’s coming from. Here are some tips for finding the source of a leak in your RV:
- Inspect the RV for leaks: The first thing you need to do is to inspect your RV for leaks. Look for any visible signs of water damage, such as stains, mold, or discoloration on the walls, ceilings, and floors. Check the bathroom, kitchen, and storage compartments, as these areas are more prone to leaks.
- Look for soft spots: Press on the walls and floors of your RV. If you notice any soft spots or give, it could be a sign of water damage.
- Check the windows and doors: The windows and doors are common areas where water can seep in. Look for any gaps or cracks in the seals around the windows and doors.
- Use a hose: To locate hard-to-find leaks, use a hose to simulate rain. Have someone inside the RV with a flashlight and watch for any water seeping through the walls or ceiling.
Once you’ve located the source of the leak, it’s time to take action. The longer you wait to address the problem, the worse it will get, and the more expensive it will be to fix.
Next, we’ll cover how to seal the windows and doors to prevent water from entering your RV.
2. Seal the Windows and Doors
Windows and doors are some of the most common areas where water can seep into your RV. To prevent this from happening, it’s essential to seal them properly. Here’s how:
- Check the seals: Start by inspecting the seals around your windows and doors. Look for cracks, gaps, or signs of wear and tear. If you notice any damage, it’s time to replace the seals.
- Remove old sealant: Use a putty knife or scraper to remove any old sealant around the windows and doors. Be sure to clean the area thoroughly before applying the new sealant.
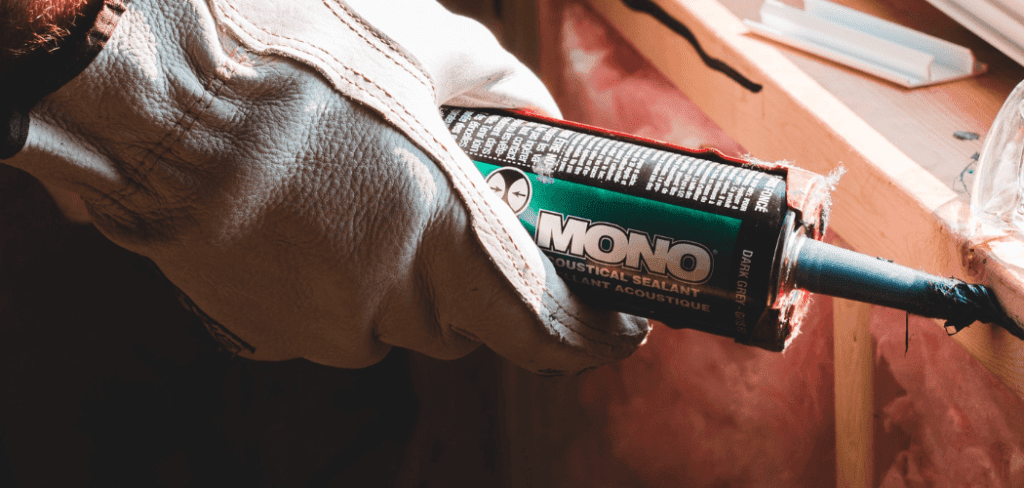
- Apply new sealant: Apply a high-quality sealant, such as silicone or butyl tape, around the windows and doors. Be sure to apply it evenly and fill any gaps or cracks. Use a caulking gun for an easier and cleaner application.
- Test the seals: Once you’ve applied the new sealant, test it by spraying water on the windows and doors. If you notice any water seeping in, you may need to apply more sealant or make additional repairs.
Remember, it’s essential to check your windows and doors regularly for any signs of damage or wear and tear. If you notice any problems, address them promptly to prevent water damage to your RV.
3. Caulk the Roof

The roof of your RV is another area that requires attention when it comes to waterproofing. Over time, the sealant on your RV’s roof can wear out, causing leaks to occur. Here’s how to caulk the roof of your RV:
- Clean the roof: Start by cleaning the roof of your RV thoroughly. Use a mild detergent and water to remove any dirt, debris, or old sealant. Rinse the roof thoroughly and let it dry completely.
- Inspect the roof: Once the roof is dry, inspect it for any signs of damage or wear and tear. Look for cracks, gaps, or areas where the sealant has come loose.
- Apply new sealant: Use a high-quality sealant, such as Dicor self-leveling lap sealant or EternaBond roof seal tape, to seal any gaps or cracks on your RV’s roof. Apply the sealant evenly and follow the manufacturer’s instructions for best results.
- Check the vents and skylights: Don’t forget to check the vents and skylights on your RV’s roof. These areas are also prone to leaks, so be sure to apply sealant around them as well.
- Test the roof: Once you’ve applied the new sealant, test the roof by spraying water on it. Check for any signs of water seeping in and make any necessary repairs.
4. Check the Vents and Skylights
Vents and skylights are common areas where water can infiltrate your RV. Over time, the seals around these areas can crack or become loose, allowing water to seep in. It’s essential to check your vents and skylights regularly to make sure they are in good condition and functioning correctly.
To check the vents, climb up onto the roof of your RV and inspect the vent covers. Look for any cracks or damage to the covers, as well as any signs of water intrusion. Check the seals around the vents and make sure they are tight and in good condition. If you notice any damage or wear, replace the vent covers or seals as needed.
Next, inspect your skylights. Check the seals around the skylights and make sure they are secure and free from any cracks or damage. Look for any signs of water intrusion, such as discoloration or water stains on the ceiling around the skylight. If you notice any damage, replace the skylight or seal as soon as possible to prevent further water damage.
It’s also essential to keep your vents and skylights clean to prevent debris from building up and obstructing them. Use a soft brush or cloth to remove any dirt or debris from the vent covers and skylights regularly.
5. Seal the Seams and Joints
Another area where water can seep into your RV is through the seams and joints. These are the areas where two different materials meet, such as where the roof meets the walls or where the windows meet the siding. Here’s how to seal these areas:
- Inspect the seams and joints: Start by inspecting all the seams and joints on your RV. Look for any signs of damage or wear and tear, such as cracks or gaps. Pay special attention to areas that are prone to movement or stress, such as around slide-outs or wheel wells.
- Clean the area: Use a cleaner, such as rubbing alcohol or acetone, to clean the area around the seams and joints. This will help ensure that the sealant adheres properly.
- Apply sealant: Use a high-quality sealant, such as RV roof sealant or silicone, to seal around the seams and joints. Apply the sealant evenly and fill any gaps or cracks. Use a caulking gun for an easier and cleaner application.
- Test the seals: Once you’ve applied the new sealant, test it by spraying water on the seams and joints. Check for any signs of water seeping in and make any necessary repairs.
It’s important to note that different materials may require different types of sealant. For example, if you have a metal RV, you may need to use a sealant that’s specifically designed for metal. Be sure to follow the manufacturer’s instructions for best results.
In addition to sealing the seams and joints, you can also consider adding a sealant tape or membrane. These products are designed to provide an extra layer of protection against water infiltration and can be especially useful for areas that are prone to movement or stress.
Related: Do RV Covers Cause Damage?
6. Protect the Underbelly
The underbelly of your RV is often overlooked when it comes to waterproofing, but it’s an important area to consider. The underbelly is exposed to road debris, water, and moisture, which can lead to rust, corrosion, and even water damage. Here’s how to protect the underbelly of your RV:
- Inspect the underbelly: Start by inspecting the underbelly of your RV. Look for any signs of damage, such as rust or corrosion. Check for any holes or gaps where water can enter.
- Clean the underbelly: Use a high-pressure washer or a specialized RV underbelly cleaning product to clean the underside of your RV. This will help remove any dirt, debris, or road grime that may have accumulated.
- Apply undercoating: Once the underbelly is clean and dry, apply an undercoating product. This will provide a protective barrier against moisture, road debris, and rust. Undercoating is available in spray-on or brush-on form and can be applied to the entire underbelly of your RV.
- Insulate the underbelly: If you plan on using your RV in cold weather, consider insulating the underbelly. This will help prevent frozen pipes and keep the interior of your RV warm. Insulation is available in various forms, such as foam boards or spray foam, and can be installed by a professional or by yourself.
- Consider a belly pan: Another option for protecting the underbelly of your RV is to install a belly pan. A belly pan is a sheet of metal or plastic that covers the entire underbelly of your RV. It provides an additional layer of protection against road debris and moisture.
