As an outdoor enthusiast, your trailer is an essential tool that helps you get all your gear to the places you love to explore. Whether you’re heading to a remote campsite, a favorite fishing spot, or a trailhead, your trailer needs to be in good working order to ensure a safe and stress-free journey.
One of the most critical components of your trailer is the equalizer, which distributes the weight of the trailer and its contents evenly across the axles. If the equalizer is out of position, it can cause uneven weight distribution, leading to excessive wear and tear on your tires, axles, and other parts of your trailer. It can also lead to unsafe towing conditions, potentially putting you and your fellow travelers at risk.
With that in mind, below, I’ll guide you through the steps to get your trailer equalizer back in position, ensuring that your trailer is safe, reliable, and ready for your next adventure. Let’s jump right in and start with the basics.
How do I get my trailer equalizer back in position?
To get your trailer equalizer back in position, you’ll need to jack up the trailer, remove the bolts holding the equalizer in place, reposition the equalizer, and then tighten the bolts back up. It’s important to ensure that the equalizer is properly aligned and the bolts are torqued to the manufacturer’s specifications. It’s recommended to consult your trailer’s owner manual or a professional mechanic for guidance.
Let’s take a deeper dive into the guide and expound on each detail.
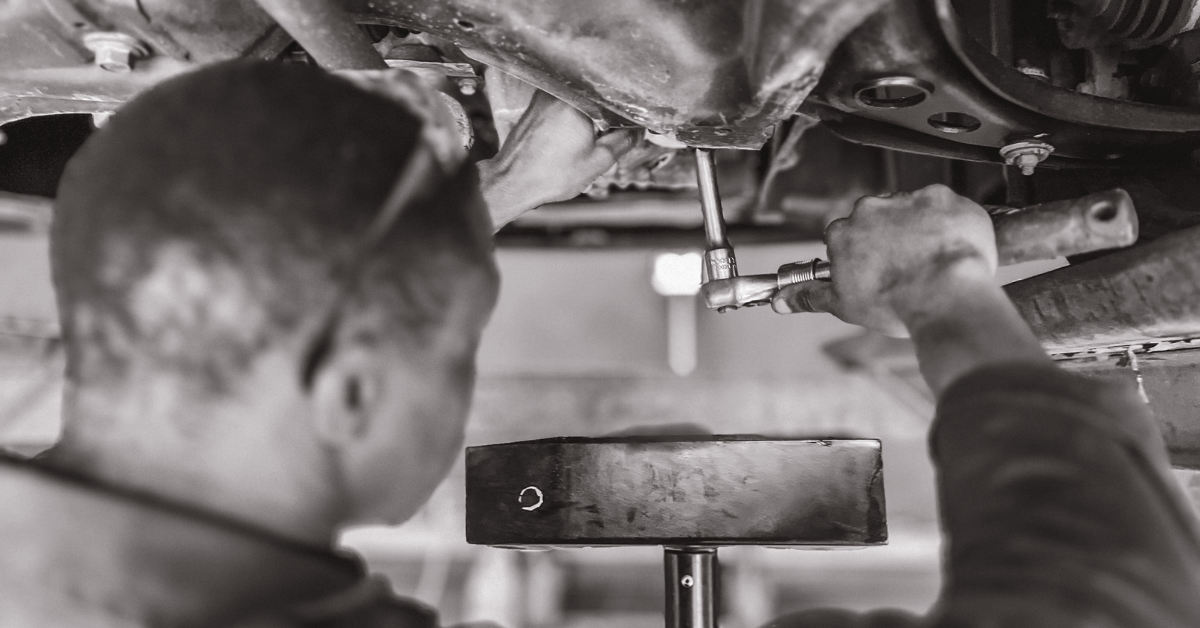
Step 1: Jacking Up Your Trailer
Before you start working on your trailer’s equalizer, you need to jack up your trailer to provide easy access to the components. However, it’s essential to choose the right location and equipment to avoid accidents and injuries. Here are the steps to follow:
1. Choose the right location to jack up your trailer
Find a flat and level surface to park your trailer, ideally a paved area or stable ground. Avoid jacking up your trailer on an incline or a surface with loose gravel or dirt.
2. Use the proper equipment to safely lift the trailer
You’ll need a high-quality hydraulic jack rated for the weight of your trailer, a jack stand, and wheel chocks. Position the wheel chocks in front of and behind the tires on the opposite end of the trailer you’ll jack up. Use the hydraulic jack to raise the trailer slowly, taking care to keep it level as you lift it.
Once the trailer is lifted, place a jack stand under the frame of the trailer and adjust it to the proper height. Lower the trailer onto the jack stand, making sure it’s stable and secure.
3. Tips for staying safe during this process
Make sure you wear appropriate safety gear, such as gloves and safety glasses, to protect your hands and eyes. Keep the jack and jack stand well-maintained and inspected for cracks or other damage.
Use a wooden block between the jack and the trailer to prevent any damage to the frame. Do not attempt to work on your trailer if the weather conditions are unfavorable, such as high winds or rain.
Step 2: Removing the Bolts Holding the Equalizer in Place
Once your trailer is jacked up and securely stabilized, you can start working on the equalizer. The first step is to remove the bolts holding the equalizer in place. Here’s how:
1. Identify the bolts holding the equalizer in place
Look for the bolts on either side of the equalizer that attach it to the trailer’s frame. There will likely be four bolts in total, two on each side.
2. Use a socket wrench to remove the bolts
Use a socket wrench that matches the size of the bolts to remove them. You may need to apply some force to break the bolts loose. Be sure to save the bolts and any other hardware in a safe place for reassembly later.
3. Tips for removing bolts safely
Use a penetrating lubricant such as WD-40 to help loosen the bolts. Make sure you have a firm grip on your socket wrench and avoid over-tightening. Always turn the wrench clockwise to loosen the bolt, and counter-clockwise to tighten it.
If a bolt is stubborn and won’t budge, apply more lubricant and try tapping the bolt head gently with a hammer to loosen it.
4. Inspect the bolts and hardware for signs of wear or damage
Check the bolts and any other hardware for signs of wear, rust, or damage. If any of these components show signs of wear, they should be replaced to ensure safe and reliable operation.
Remember to work carefully and always prioritize your safety and the safety of those around you when working on your trailer.
Step 3: Repositioning the Equalizer
Now that you’ve removed the bolts holding the equalizer in place, you can reposition it to the correct spot. Here’s how to do it:
1. Identify the correct position of the equalizer
Check your trailer manual or the manufacturer’s website for guidance on where the equalizer should be positioned. Make sure you have a clear understanding of the correct position before moving forward.
2. Use a pry bar to reposition the equalizer
Place a pry bar or a similar tool between the equalizer and the trailer frame to move the equalizer back into position. Be careful not to apply too much force, as you may damage the components or trailer.
3. Use the bolts to secure the equalizer in place
Once the equalizer is in the correct position, use the bolts you removed earlier to secure it in place. Tighten the bolts using a socket wrench, being careful not to overtighten.
4. Inspect the equalizer for signs of wear or damage
Take a close look at the equalizer to make sure it’s in good condition and free from signs of wear or damage. If you spot any issues, be sure to address them before using your trailer.
5. Lower your trailer and test it
Once you’ve repositioned the equalizer and secured it in place, lower your trailer and check to see if it’s level. You may need to make additional adjustments to the equalizer or other components to achieve the proper leveling.
Step 4: Tightening the Bolts Back Up

Now that you’ve repositioned the equalizer and ensured that it’s in the correct position, it’s time to tighten the bolts back up. Here’s how to do it:
1. Get the right tools
Before you start, make sure you have the right tools for the job. You’ll need a socket wrench, a torque wrench, and the appropriate size sockets.
2. Start tightening the bolts
Begin by tightening the bolts on one side of the equalizer, using the socket wrench. Then move to the other side and repeat the process. Tighten the bolts as much as you can by hand.
3. Use a torque wrench to achieve the right torque
After hand tightening, use a torque wrench to achieve the appropriate level of tightness. Check your trailer manual or the manufacturer’s website for guidance on the right torque level for your specific trailer model.
4. Double-check your work
Once you’ve used the torque wrench to tighten the bolts, double-check your work to make sure everything is secure. Give each bolt a gentle tug to ensure that it’s tight and won’t come loose during transit.
5. Repeat the process for the other bolts
After you’ve tightened the first set of bolts, repeat the process for the remaining bolts holding the equalizer in place. Follow the same steps to achieve the correct torque level and double-check your work for each bolt.
Related: How Do I Know If My Trailer Tires Are Overloaded?
Step 5: Checking for Proper Alignment
Once you’ve tightened the bolts back up, it’s important to check that the equalizer is properly aligned. This will help to ensure that your trailer operates safely and efficiently on the road. Here’s how to check for proper alignment:
1. Use a tape measure
Start by measuring the distance between the center of the front and rear hangers on each side of the trailer. This will give you an idea of whether the equalizer is centered properly. The measurements should be the same on both sides.
2. Check the height of the trailer
Next, check the height of the trailer at both the front and rear. The trailer should be level from front to back. If the trailer is not level, it could indicate that the equalizer is not properly aligned.
3. Inspect the position of the spring shackles
Check the position of the spring shackles and ensure they are all aligned. This will help ensure that the equalizer is centered properly.
4. Look for signs of wear or damage
Finally, inspect the equalizer for signs of wear or damage. If you notice any cracks, breaks, or other signs of wear, it may be time to replace the equalizer.
If you’re unsure about any aspect of the inspection process, seek advice from a professional or your trailer’s manufacturer. Taking the time to inspect and maintain your trailer can help ensure that it lasts for many years and remains safe for all your outdoor adventures.
Conclusion – How to Get the Trailer Equalizer Back in Position
If you need to reposition your trailer’s equalizer, start by jacking up your trailer and then removing the bolts holding the equalizer in place. Next, reposition the equalizer and secure it by tightening the bolts. Finally, check to ensure the equalizer is properly aligned to prevent safety hazards while towing your trailer.
Remember, if you’re unsure about any aspect of the process, it’s always a good idea to consult a professional or your trailer’s manufacturer for advice. They can provide guidance and support to ensure that your trailer remains safe and in good condition for all your outdoor adventures.
By taking the time to maintain your trailer and its components, you can help ensure that it lasts for many years and remains safe for all your outdoor activities.